How to start a VM from instance snapshot using Horizon dashboard on WEkEO Elasticity
In this article, you will learn how to create a virtual machine from an instance snapshot using Horizon dashboard.
Prerequisites
No. 1 Account
You need a WEkEO Elasticity hosting account with access to the Horizon interface: https://horizon.cloudferro.com.
No. 2 Ephemeral storage vs. persistent storage
Please see article Ephemeral vs Persistent storage option Create New Volume on WEkEO Elasticity to understand the basic difference between ephemeral and persistent types of storage in OpenStack.
No. 3 Instance snapshot
You need to have an instance snapshot from which you are going to create your virtual machine. In this article, we will use an exemplary snapshot named my-instance-snapshot - here is how it can look like in section Images -> Images of the Horizon dashboard:

The following articles contain information how to create such a snapshot:
How to create instance snapshot using OpenStack CLI on WEkEO Elasticity
How to create instance snapshot using Horizon on WEkEO Elasticity
Note that the name of instance snapshot which will be used in this article is different than the names used in the above mentioned articles.
Regardless, we will cover both
snapshots of instances which use ephemeral storage, as well as
snapshots of instances which use persistent storage.
Special rules for snapshots of instances which use persistent storage
If your snapshot uses persistent storage, special rules apply. That instance snapshot will not have its own storage, but a metadata section, which lists volume snapshots which were created for each of the volumes.
Some or all of these volume snapshots theoretically might not exist because later they might have been, say, deleted.
Therefore:
- Volume snapshot that represents boot drive is missing
In that case, you will not be able to use instance snapshot to create a virtual machine.
- Volume snapshot that represents boot drive is still present
You will be able to use instance snapshot to create a virtual machine. If additional volumes have been connected to your VM, only the ones which still have their respective volume snapshots mentioned in metadata of instance snapshot will be recreated.
No. 4 Access to the virtual machine being created
There are different methods of accessing virtual machines, SSH and web console being the most popular.
For SSH, while creating a virtual machine from a volume snapshot, there may be an option of “injecting” an SSH key to the machine being created. Some operating systems are compatible with this feature, while others are not.
If it is not possible to attach an SSH key while creating new instance from a particular instance snapshot, make sure that there is another way of accessing it. Apart from SSH and web-based access, there also are RDP, VNC, API access, web-based tools (Guacamole), SFTP/FTP.
You should know how to access the instance before you start recreating it from a snapshot.
Anyway, see the following related links:
How to add SSH key from Horizon web console on WEkEO Elasticity
What if I Forgot to Add the SSH Key to my VM - or Deleted it?
How to access the VM from OpenStack console on WEkEO Elasticity
No. 5 Familiarity with the process of creating a virtual machine
We will use the following article as the reference article How to create a Linux VM and access it from Linux command line on WEkEO Elasticity. Out of eight or nine steps outlined in that article, we modify just two, in Steps 2 and 6 (see below).
The instance snapshot used here does not have to actually contain Linux - if this is the case, you can ignore Linux-specific parts of reference article.
What We Are Going To Cover
Creating VM from instance snapshot
Identical Step 1 Name the Virtual Machine you are recreating
Changed Step 2 Boot from the existing image snapshot
Identical Step 3 Define the flavor of the instance
Identical Step 4 Define networks for the virtual machine
Identical Step 5 Define security groups for VM
Changed Step 6 SSH key pair
Identical Step 7 Create the instance
Identical Step 8 Attach a Floating IP to the instance
Possibly identical Step 9 Connecting to your virtual machine using SSH
What can go wrong when recreating instance from instance snapshot
Verifying volumes (persistent storage)
Creating VM from instance snapshot
These steps are the same no matter whether your instance is using ephemeral or persistent storage.
In this example, we will create an instance named instance-from-snapshot - its source is instance snapshot named my-instance-snapshot that is already present in the system.
Follow reference article mentioned in Prerequisite No. 5. Where identical, we do not supply the images from the reference article but only hint at the commands from Horizon Dashboard.
Steps 2 and 6 will be different so in these two cases we provide detailed explanation of the process.
Identical Step 1 Name the Virtual Machine you are recreating

From Horizon dashboard, execute Compute -> Instances -> Launch Instance. As a minimum, use field Instance Name to enter the name of the VM that you want to recreate.
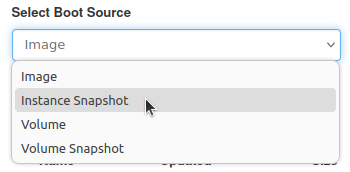
Changed Step 2 Boot from the existing image snapshot

In Step 2 of above mentioned article, you are supposed to choose the image from which you want to create a virtual machine. Instead of that, from the drop-down menu Select Boot Source choose option Instance Snapshot. This will allow you to choose from the existing image snapshots.
You should get a list of image snapshots:
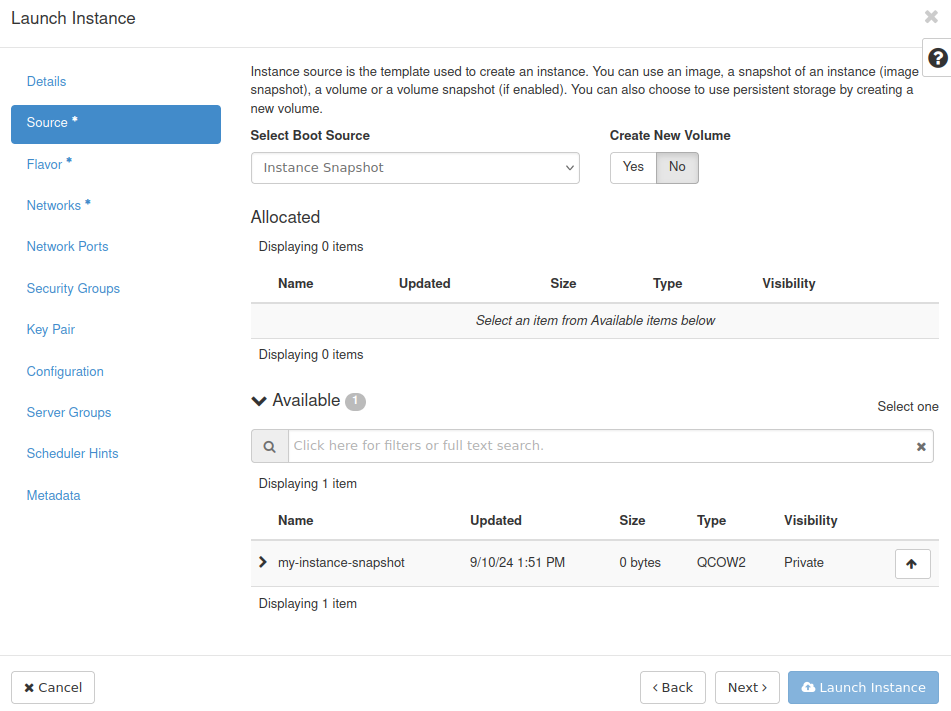
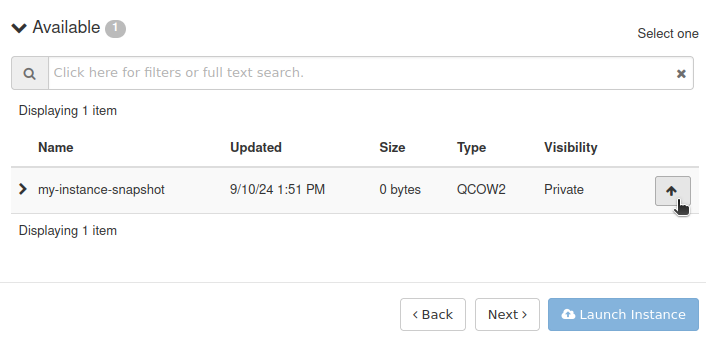
Click ↑ next to the image snapshot from which you want to create your virtual machine:
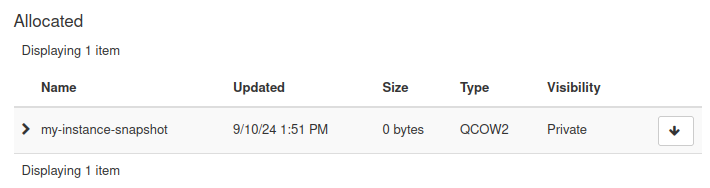
It should now be visible in the Allocated section:
Identical Step 3 Define the flavor of the instance

Use option Flavor in window Launch Instance.
Identical Step 4 Define networks for the virtual machine

Use option Networks in window Launch Instance.
This is the end of obligatory options. To be able to access instance through an SSH connection, you will need to define Security Groups and Key Pair.
Identical Step 5 Define security groups for VM

Use option Security Groups in window Launch Instance.
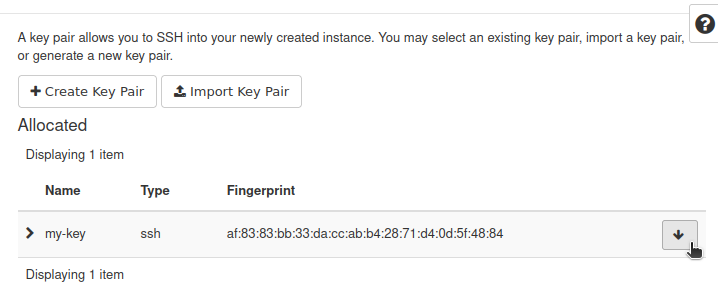
Changed Step 6 SSH key pair

If your particular installation of an operating system supports “injecting” of an SSH key this way, you can perform this step just like it was done in the reference article.
If, however, it does not support this process, make sure that no keys are selected in this step. If a key has already been chosen and exists in the Allocated section, you can click ↓ next to its name to unselect it:
Identical Step 7 Create the instance

Finally, click on Launch Instance.
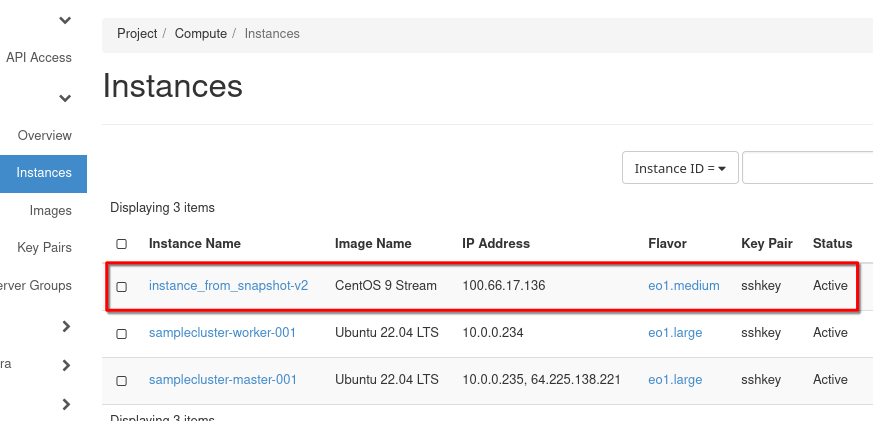
You will see the new instance through Compute -> Instances.
Identical Step 8 Attach a Floating IP to the instance
You should be able to attach a floating IP to a virtual machine created in this way just like to any other virtual machine.
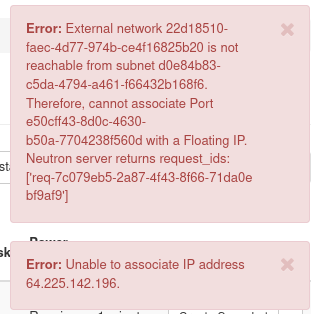
Take care which network you are attaching to the new instance in Step 4. If the original instance had access only networks internal to the cloud, it will not be possible to create a floating IP, as an external network to get out to the Internet. You may get a message like this in such a case:
The floating IP will almost certainly be different from the value provided in the reference article so adjust where needed.
Possibly identical Step 9 Connecting to your virtual machine using SSH
If it is possible to get access using SSH, just see Step 9 from the reference article. Note that the command might be different if for example your operating system uses different username.
If you are using some other way of accessing, this step may be drastically different and such cases are out of scope of this article.
What can go wrong when recreating instance from instance snapshot
- Wrong flavors
If you specify flavor with insufficient resources like storage, it might not be possible to create an instance, or it might run worse than previously, or not run at all.
- Incorrect or Missing Networks
The network or subnet that you want to use may be absent, deleted, renamed or even not selected during the recreation process.
If recreated without network connection, the instance may be inaccessible and/or it might not be able to access other resources (like for example databases) which it needs for correct operation.
- Unattached volumes
Connected volumes are usually not included with the instance snapshot. See Prerequisite No. 3 for more information.
Without volumes, there may be no data to operate upon, or something else may be incomplete.
- Loss of metadata or configuration data
If you had custom metadata, user data scripts, special configuration settings… all these may have to be executed once the instance is restored.
If not, the applications in that setup may behave erratically or not even start.
- IP addresses changed
The recreated instance might have a different IP address. That may result in loss of connectivity and access.
You might recognize it as broken links, disrupted communications, failed services in case they rely on static IPs.
- Improper quotas and resources
Quotas and limits for the new instance may differ from the quotas and limits from the old instance.
The instance will not be created until the quotas are readjusted.
- Failed external services
The instance may depend on external databases, external storage or other types of external services – and it is possible that these are not recreated automatically with the instance.
In that case, the services that you hope to be using the instance for, won’t be available or will malfunction.
- Inconsistent snapshot state
It is advised to first shut down the instance and only then create its snapshot. If the shapshot was taken while the instance was running, some data may be lost or corrupted.
This will lead to application errors, data loss or system instability.
- Incompatible environments
The instance might work incorrectly or even not work at all if it contains drivers and other software that is incompatible with the current environment - flavor and/or cloud.
Verifying volumes when using persistent storage
Skip this section if your instance uses ephemeral storage.
If you created an instance from snapshot of instance which uses persistent storage, you should check whether all volumes were successfully recreated from their respective volume snapshots.
Once the instance was built (its Status is Active), click on its name:
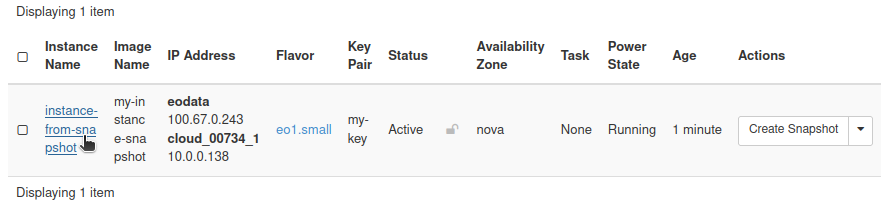
You should get more detailed informations about your instance. Scroll to the bottom of the page. You should see section Volumes Attached which contains volumes attached to your instance:
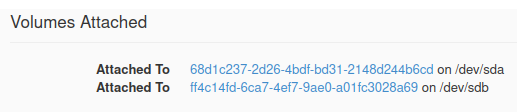
Note that the reference names of volumes are not preserved here. The names of volumes created by this process are the same as their respective IDs and not the same as IDs of their reference volumes or snapshots.
You can click on each of their names to see more details, for example:
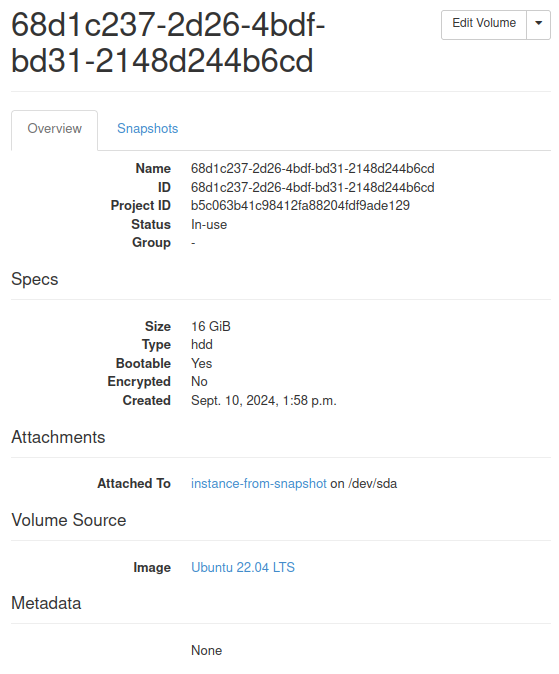
Properties such as Size or Bootable should be the same as it was in the case of reference volumes.
What To Do Next
If you want to create a virtual machine from an instance snapshot using the OpenStack CLI client instead of the Horizon dashboard, see: How to start a VM from instance snapshot using OpenStack CLI on WEkEO Elasticity